- Download the Windows 10 ISO:
- First, obtain the Windows 10 ISO image from the official Microsoft website or using the MediaCreationTool free tool.
- Prepare Your USB Flash Drive:
- Insert a USB flash drive with at least 8GB storage capacity into your PC.
- Use Rufus to Create the Bootable Drive:
- Download Rufus, a utility that formats and creates bootable USB drives.
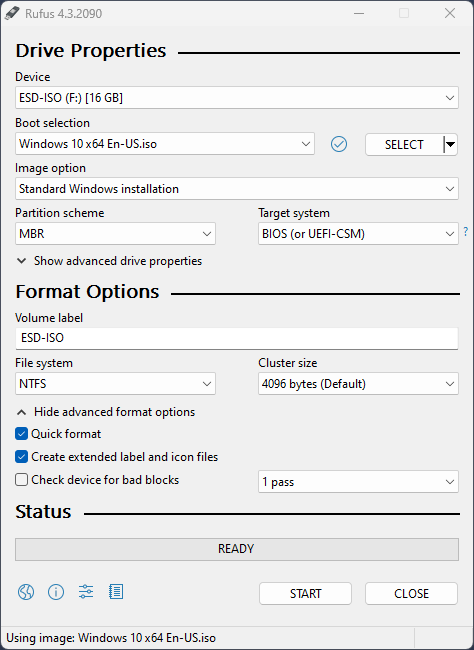
- Open Rufus and select the corresponding letter for your USB drive in the Device tab.
- Choose the Windows 10 ISO File:
- In the Boot selection tab, click the button next to SELECT.
- Choose the previously downloaded Windows 10 .iso file (you can also drag and drop the file onto Rufus).
- Configure Rufus Settings:
- Rufus may already recognize your .iso image and apply some predefined settings.
- However, ensure the following settings:
- Image options: Select Standard Windows installation.
- Partition scheme: Choose MBR (Master Boot Record) for older systems or GPT (GUID Partition Table) for new motherboards with UEFI mode.
- Under Show Format Options, check Quick Format and Create extended label and icon files.
- Start the Process:
- Click START in Rufus.
- The utility will format your USB flash drive and automatically copy the required files from the .iso image.
- The process duration depends on your PC’s performance.
- When finished, you’ll see a READY status in the progress bar.
Your bootable USB drive is now ready! You can use it to install or repair Windows 10.
Click here to see the complete list of boot and BIOS keys.
If you encounter any difficulties or other inconveniences, do not hesitate to contact us.