Introduction
The Disk Cleanup utility is a built-in tool in Windows that helps remove unnecessary files, including temporary files and system leftovers.
By using this utility, you can free up valuable disk space and improve your system’s performance.
Steps to Use Disk Cleanup:
- Access Disk Cleanup:
- Click on the Start button and type “disk cleanup” in the search box.
- Select Disk Cleanup from the search results.
- Choose the Drive:
- In the Disk Cleanup window, select the drive you want to clean up (usually the one with the operating system).
- Click OK.
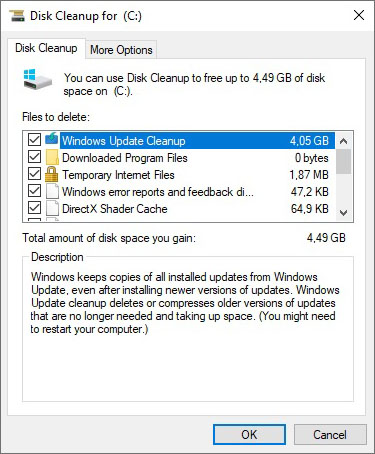
- Select File Types to Delete:
- Under Files to delete, you’ll see various file types. Check the ones you want to remove:
- Temporary files
- Recycle Bin contents
- Temporary internet files
- System logs
- Thumbnails
- To get a description of each file type, hover over it.
- Click OK to proceed.
- Under Files to delete, you’ll see various file types. Check the ones you want to remove:
- Estimate Space Gain:
- The utility will scan the selected files and estimate the space you’ll gain after cleaning.
- Review the summary and confirm by clicking OK again.
- Clean System Files (Optional):
- If you need to free up more space, click Clean up system files.
- Select additional file types (such as old Windows updates) and click OK.
- Wait for Completion:
- The process may take a few minutes, depending on available free space.
Tips:
- Regularly running Disk Cleanup helps maintain your system’s health and responsiveness.
Remember to save your work before performing disk cleanup.
If you encounter any difficulties or other inconveniences, do not hesitate to contact us.